OpenHarmony自定义全屏系统桌面
https://harmonyos.51cto.com
Launcher系统桌面应用
Launcher 作为系统人机交互的首要入口,提供应用图标的显示、点击启动、卸载应用,并提供桌面布局设置以及最近任务管理等功能。
Launcher 采用纯 JS 语言开发,开发过程中不涉及任何 Java 部分的代码。
https://gitee.com/openharmony/applications_launcher
开发环境
- 系统版本:OpenHarmony 3.0LTS / OpenHarmony 3.1beta
- 开发板:3516 / rk3568
- IDE:DevEco3.0.0.800
前置知识
【甜甜酱OH实践】OpenHarmony预置系统应用编译安装全流程记录
https://harmonyos.51cto.com/posts/10395
实现桌面全屏
首先我们了解两个重要的接口能力。
Window
窗口。
导入模块
import window from '@ohos.window';
window.getTopWindow
getTopWindow(callback: AsyncCallback): void
获取当前窗口,用于获取到window实例。

Window实例 moveTo方法
moveTo(x: number, y: number, callback: AsyncCallback): void
窗口位置移动。

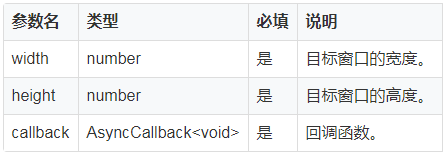
Window实例 resetSize方法
resetSize(width: number, height: number, callback: AsyncCallback): void
改变当前窗口大小。
Display
显示设备属性。
导入模块
import display from '@ohos.display';
使用OpenHarmonySDK时,IDE是找不到对应的模块的。这个时候,我们就可以使用忽略大法。
// @ts-ignore
import display from '@ohos.display';
display.getDefaultDisplay
getDefaultDisplay(callback: AsyncCallback): void;
获取当前默认的display对象。

Display
描述display对象的属性。

改变Launcher应用窗体
// app.ets
// @ts-ignore
import display from '@ohos.display'
import Window from '@ohos.window';

export default {
  onCreate() {
    console.info('Application onCreate')

    //在此改变应用窗体
    display.getDefaultDisplay().then(dis => {
      //获取屏幕高宽 dis.width dis.height
      Window.getTopWindow()
        .then((windowData) => {
          //修改窗口定位
          windowData.moveTo(0, 0).then((result) => {
              //改变窗口大小
              windowData.resetSize(dis.width, dis.height)
              .then((result) => {});
          });
        });
    })
  },
  onDestroy() {
    console.info('Application onDestroy')
  },
}
签名->编译->安装->重启。
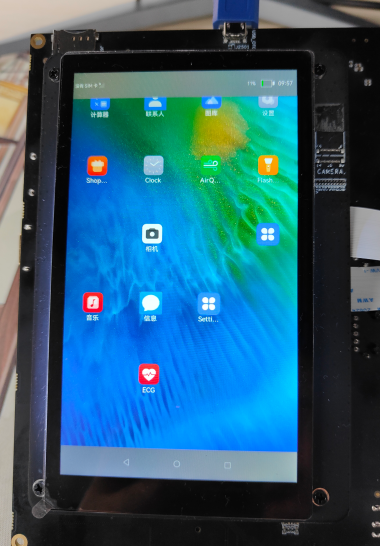
我们发现桌面看起来是改变了,但是还是被状态栏和导航栏遮挡。
效果如图:
重要的配置文件
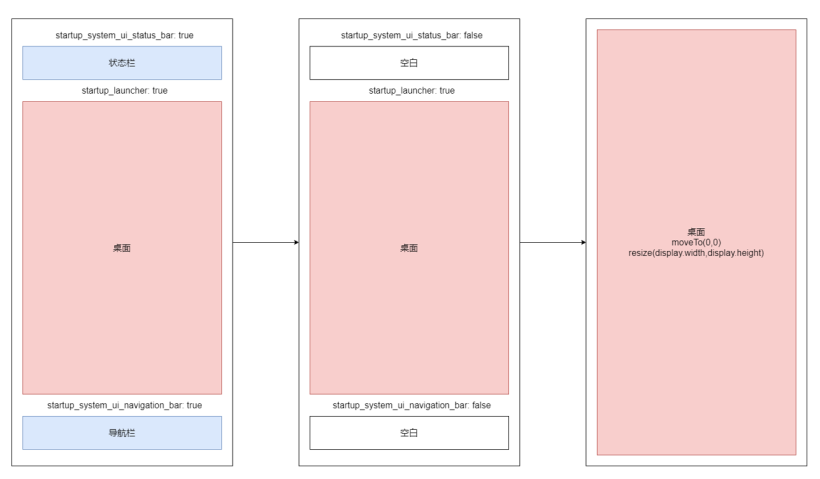
OpenHarmony会为StatusBar,Launcher,NavigationBar三个应用分别初始化好各自窗体位置。
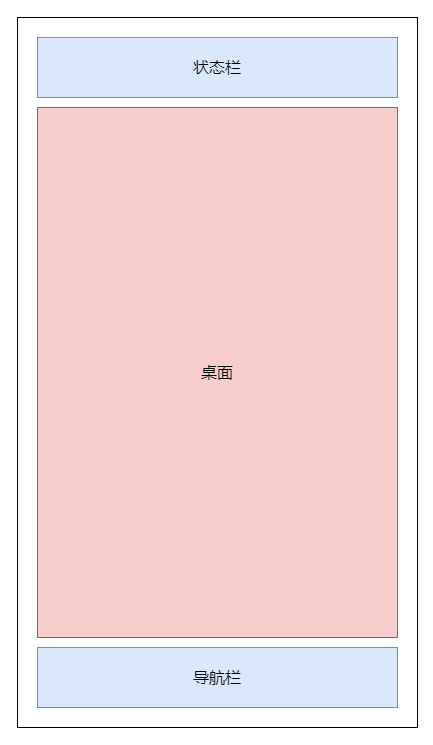
StatusBar,NavigationBar这两个应用分别占据设备屏幕的最上和最下的位置,并始终保持在所有应用的最上层。
Launcher应用为配合StatusBar,NavigationBar,会空出上下区域。
计算桌面应用/其他应用的实际高度,是需要设备屏幕高度去减去空出的上下区域高度的。
OpenHarmony未提供一个实际计算应用实际展示区域高宽的接口
OpenHarmony提供了一个配置文件system/etc/ams_service_config.json。

在系统启动时,会读取该文件的配置信息,决定哪些系统应用需要启动。
OpenHarmony 3.0LTS 与 3.1beta的配置信息有所不同
// 3.0LTS
{
  "service_startup_config": {
    "startup_launcher": true,
    "startup_system_ui_status_bar": true,
    "startup_system_ui_navigation_bar": true
  }
}
// 3.1beta
{
    "service_startup_config": {
        "startup_launcher": true,
        "startup_settings_data": true,
        "startup_system_ui_status_bar": true,
        "startup_system_ui_navigation_bar": true,
        "startup_phone_service": true,
        "startup_contacts": true,
        "startup_mms": true,
        "mission_save_time": 43200000
    },
    "memorythreshold": {
        "home_application": "20"
    },
    "system_configuration": {
        "system_orientation": "vertical"
    }
}
这里我们只需要选择不启动StatusBar与NavigationBar应用即可。
// 修改文件内容
"startup_system_ui_status_bar": false,
"startup_system_ui_navigation_bar": false
替换开发板上的文件(记得对源文件进行备份)。
hdc_std file send E:\ams_service_config.json system/etc/ams_service_config.json
重启系统。
hdc_std shell reboot
可以看到桌面占满整个屏幕了。
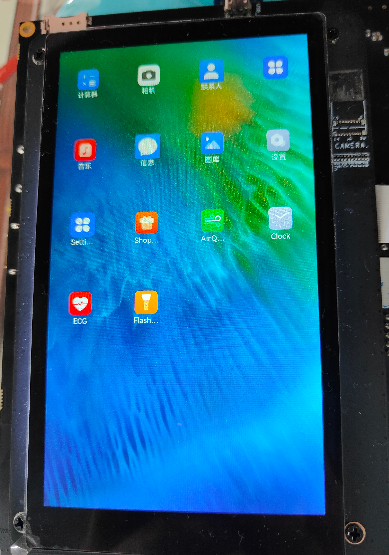
若不改变桌面应用窗体,可以看到屏幕上方与下方会空出了一块黑色区域。
我当前使用的系统的3.1beta,是会出现花屏问题。3.0LTS可以看到是一块纯黑的区域。
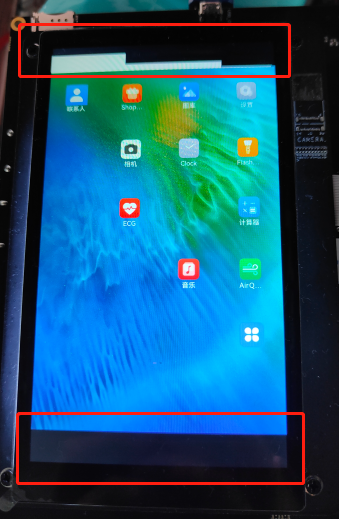
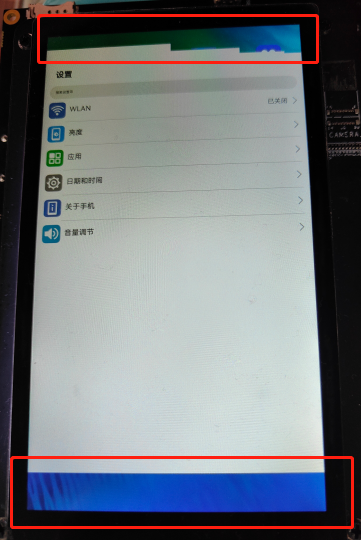
虽然改变了桌面的窗体,但是其他应用还是被限制在原来的窗体下。打开设置应用,会发现应用窗体上下出现了空白。
实现原理
自定义桌面
完成这一系列操作后,我们现在来自定义一个全屏桌面。
我这里写了一个横屏的Hello World。
创建工程
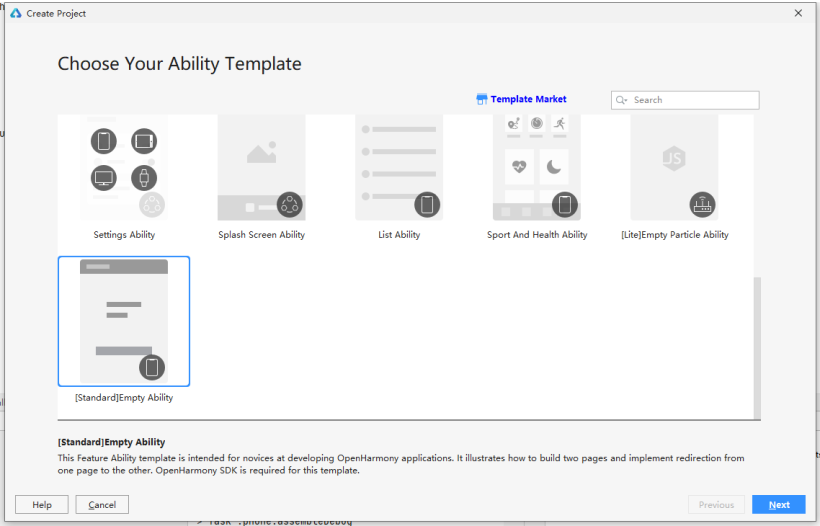
新建OpenHarmony工程,选择[Standard]Empty Ability
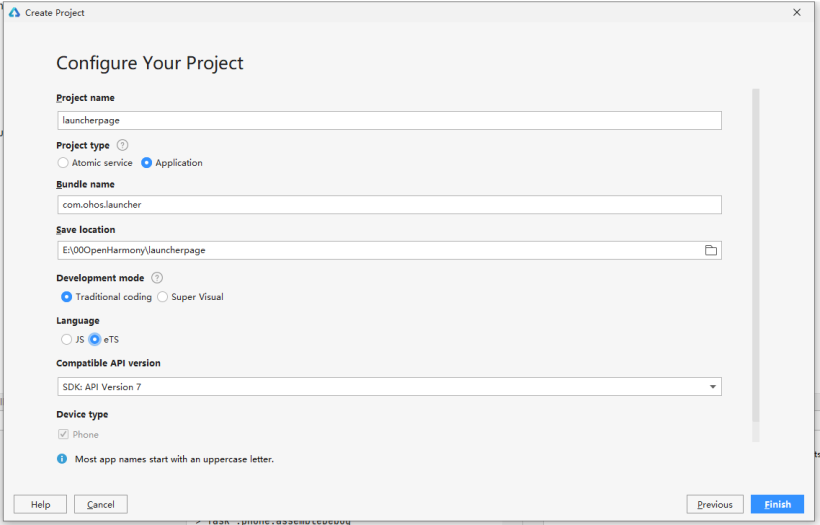
配置工程,按照以下内容配置。
- Bundle name:com.ohos.launcher (系统指定的桌面应用bundlename)
- Languaget: eTS
- Compatible API version: SDK: API Version 7
先按照之前的内容,实现桌面应用窗体全屏。
// app.ets
// @ts-ignore
import display from '@ohos.display'
import Window from '@ohos.window';

export default {
  onCreate() {
    console.info('Application onCreate')

    //在此改变应用窗体
    display.getDefaultDisplay().then(dis => {
      //获取屏幕高宽 dis.width dis.height
      Window.getTopWindow()
        .then((windowData) => {
          //修改窗口定位
          windowData.moveTo(0, 0).then((result) => {
              //改变窗口大小
              windowData.resetSize(dis.width, dis.height)
              .then((result) => {});
          });
        });
    })
  },
  onDestroy() {
    console.info('Application onDestroy')
  },
}
页面。
// index.ets
@Entry
@Component
struct Index {
  // 润和3516
  private w: number = 480
  private h: number = 960

  // rk3568
  // private w: number = 720
  // private h: number = 1920

  build() {
    Flex({ direction: FlexDirection.Column, alignItems: ItemAlign.Center, justifyContent: FlexAlign.Center }) {
      Text("Hello World").fontColor("#fff200").fontSize('150px')
    }
    .width(this.h + 'px')
    .height(this.w + 'px')
    .backgroundColor("blue")
    .translate({
      x: -(this.h - this.w) / 2 + 'px',
      y: (this.h - this.w) / 2 + 'px'
    })
    .rotate({ z: 1, angle: 90, centerX: '50%', centerY: '50%' })
  }
}
Previewer设置
想先在Previewer中查看效果的话,请按以下内容进行设置。
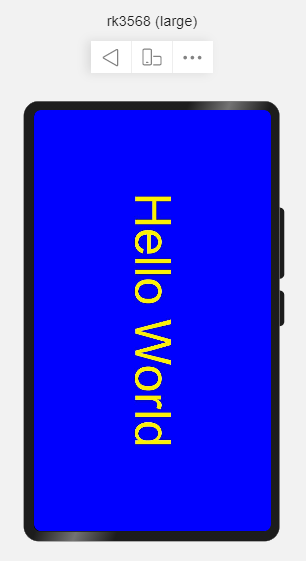
使用rk3568开发板的小伙伴请按以下新增Previewer Profile。
- Device type:phone
- Resolution:720 x 1280
- DPI:160
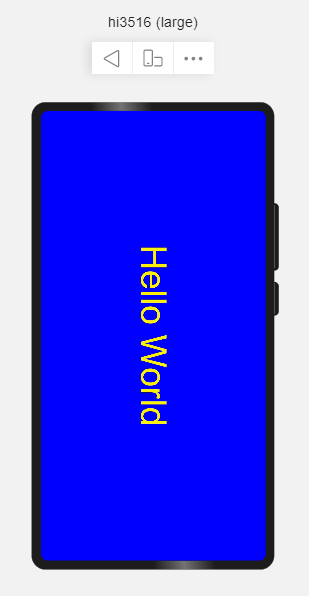
使用3516开发板的小伙伴请按以下新增Previewer Profile。
由于profile有分辨率大小有限制,所以3516模拟建议使用以下配置。
// 模拟代码请相应地将高宽*2,编译时记得去掉就好了
private w: number = 480 * 2
private h: number = 960 * 2
- Device type:phone
- Resolution:960 x 1920
- DPI:320
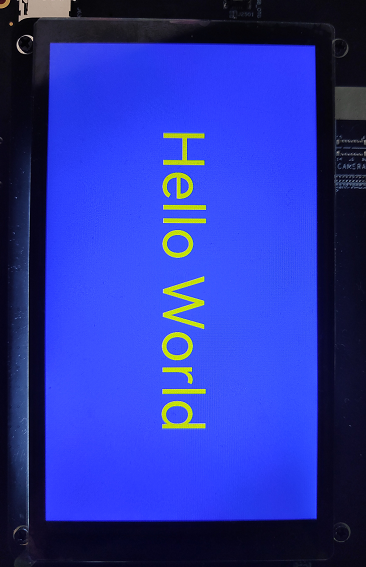
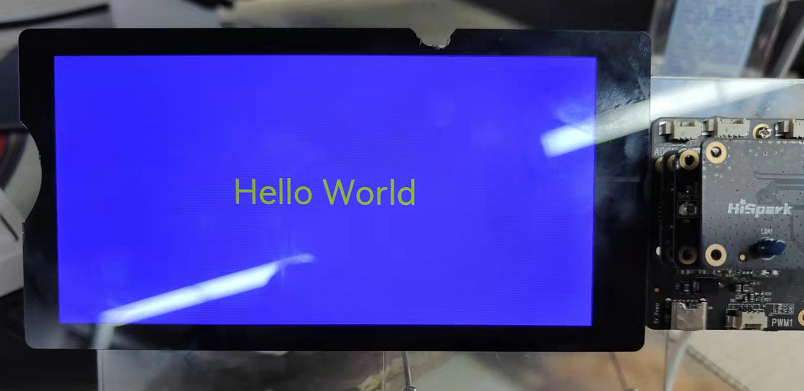
最终效果
签名->编译->安装->重启,完成!
- RK3568效果
- 3516效果
https://harmonyos.51cto.com

 蜀ICP备20004578号