小熊派北向通过JS自定义接口调用南向驱动(以点亮LED为例)

https://harmonyos.51cto.com
引言
通常我们做鸿蒙北向应用开发的时候是没法调用开发环境中未提供的接口的,而我们也知道鸿蒙开发是分北向和南向的,那么我们如何才能调用南向写好的设备驱动呢?
这里我们就用一个小熊派开发板控制LED的案例来了解一下,南向那边写好LED驱动后,他们还会自定义一个JS的API接口去调用他们开发好的LED灯驱动,这一部分称为系统定义接口。具体南向怎么开发驱动,怎么完成系统定义接口的可以看看另外一位同学的文章:
【FFH】小熊派添加自定义JS API接口流程(以点亮LED为例)
而我们北向是不能直接调用非环境自带的接口的,我们需要自定义JS接口,即在系统接口文件中定义一个JS接口,才能和小熊派开发板进行交互,接下来我们来看看具体怎么操作。
相关概念
JS自定义接口: 在我们需要使用一些开发环境未提供给我们的能力时,我们可以自定义一些接口。
系统定义接口: 我们定义完JS接口后也是不能直接使用的,必须在系统代码中完成定义的接口才行。
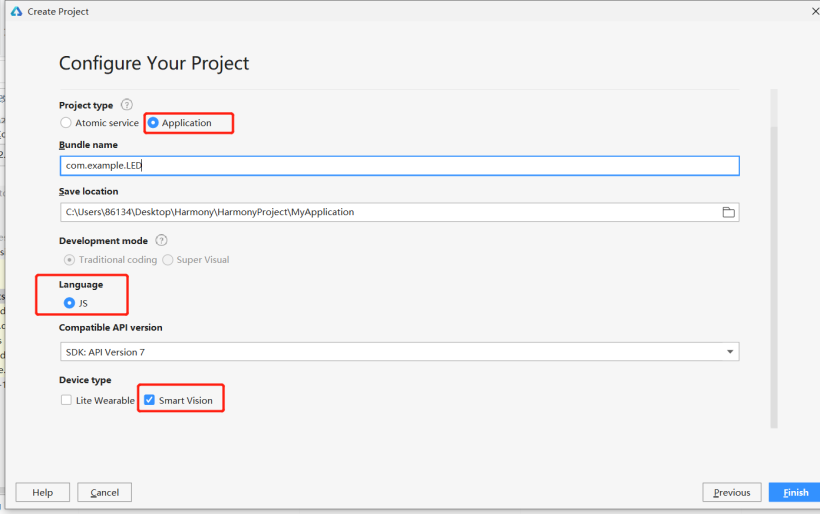
1.创建工程文件


- Project type: Application
- Language: JS
- Device type: Smart Vision
2.添加接口定义


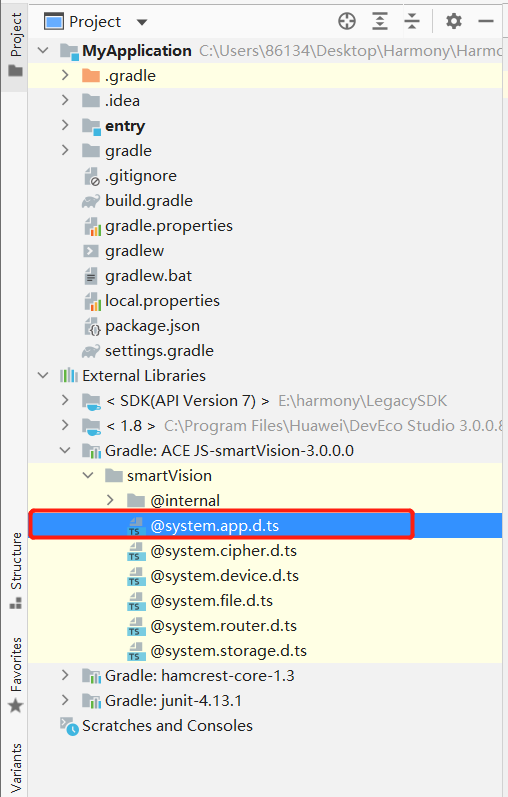
首先想要调用系统未提供的接口时需要现在系统接口文件中定义一个JS接口,这里我们就在 @system.app.d.ts文件中定义该接口。找到后在其中添加你需要定义的接口,该接口必须是在系统代码中你所实现的接口(也就是需要参考南向的系统接口开发),必须是南向封装好的驱动接口,才能在该文件进行添加,添加完成后就可以在代码中调用了。具体文件位置如上图所示。
我们这里以LED的例子,在 @system.app.d.ts文件中的 export default class App {} 类里添加了这样一个接口。
export default class App {
  /**
   * Obtains the declared information in the config.json file of an application.
   */
  static getInfo(): AppResponse;
  /**
   * Destroys the current ability.
   */
  static terminate(): void;
  //自定义接口
  static ledcontrol(options: {
    code: number;
    success?: (res: string) => void;
    fail?: (res: string, code: number) => void;
    complete?: () => void;
  }): void;
}
该接口就是控制LED灯的开关。
code:指令代码
- 0:关闭LED
- 1:打开LED
- 2:led状态翻转
success,fail:状态回调函数
- res:该请求的回复,
- code:返回当前led状态,0:关闭状态,1:打开状态。
这样我们JS自定义接口就完成啦。
3.编写页面代码
首先是index.hml代码:
<div class="container">
    <div class="title-view">
        <div class="back-view" onclick="exit">
            <image class="back-img" src="../../common/back.png"/>
            <text class="back-btn"> 退出 </text>
        </div>
        <text class="title">
            {{ title }}
        </text>
    </div>
    <image class="ledImg" if="{{statu == '0'}}" src="../../common/led_off.png" />
    <image class="ledImg" if="{{statu == '1'}}" src="../../common/led_on.png" />
    <div class="ledAction">
        <div class="ledAction-view" onclick="open">
            <image class="ledAction-img" src="../../common/open.png"/>
            <text class="ledAction-btn">
                开灯
            </text>
        </div>
        <div class="ledAction-view" onclick="change">
            <image class="ledAction-img" src="../../common/change.png"/>
            <text class="ledAction-btn">
                转换
            </text>
        </div>
        <div class="ledAction-view" onclick="close">
            <image class="ledAction-img" src="../../common/close.png"/>
            <text class="ledAction-btn">
                关灯
            </text>
        </div>
    </div>
</div>
接着是index.css代码
.container {
    width: 800px;
    height: 480px;
    flex-direction: column;
    align-items: center;
}
.title {
    width: 800px;
    font-size: 40px;
    text-align: center;
}
.ledImg{
    width: 200px;
    height: 200px;
    margin-top: 10px;
}
.ledAction{
    padding: 10px;
    margin-top: 20px;
    height: 130px;
    width: 800px;
    flex-direction: row;
    justify-content: space-around;
    align-items: center;
}

.ledAction-view{
    width: 120px;
    height: 120px;
    flex-direction: column;
    justify-content: center;
    align-items: center;
}
.ledAction-img{
    width: 60px;
    height: 60px;
}
.ledAction-btn{
    width: 120px;
    margin-top: 10px;
    font-size: 25px;
    text-align: center;
}
.title-view{
    width: 800px;
    height: 110px;
    flex-direction: column;
}
.back-view{
    height: 60px;
    width: 200px;
    flex-direction: row;
    justify-content: flex-start;
    align-items: center;
}
.back-img{
    height: 30px;
    width: 30px;
    margin-left: 10px;
}
.back-btn{
    font-size: 30px;
}
4.编辑JS代码
最后就是在index.js编写相关业务代码
导入系统接口文件
import app from '@system.app';
编写相关功能函数
//灯状态 0是关闭 1是开启
var led = {open:1,close:0,change:2}
import app from '@system.app';
export default {
    data: {
        title: 'BearPi-HM Micro',
        statu:'0'
    },
    exit(e){
        app.terminate()
    },
    open(e){
        let that = this
        app.ledcontrol({
            code:led.open,
            success(res){
                that.statu = res.led_status
            },
            fail(res,code){
            },
            complete(){
            }
        })
    },
    close(e){
        let that = this
        app.ledcontrol({
            code:led.close,
            success(res){
                that.statu = res.led_status
            },
            fail(res,code){

            },
            complete(){
            }
        })
    },
    change(e){
        let that = this
        app.ledcontrol({
            code:led.change,
            success(res){
                that.statu = res.led_status
            },
            fail(res,code){
            },
            complete(){
            }
        })
    }
}
5.打包成hap包并部署到开发板上


具体怎么部署到开发板上,有兴趣了解的可以参考我之前的文章:
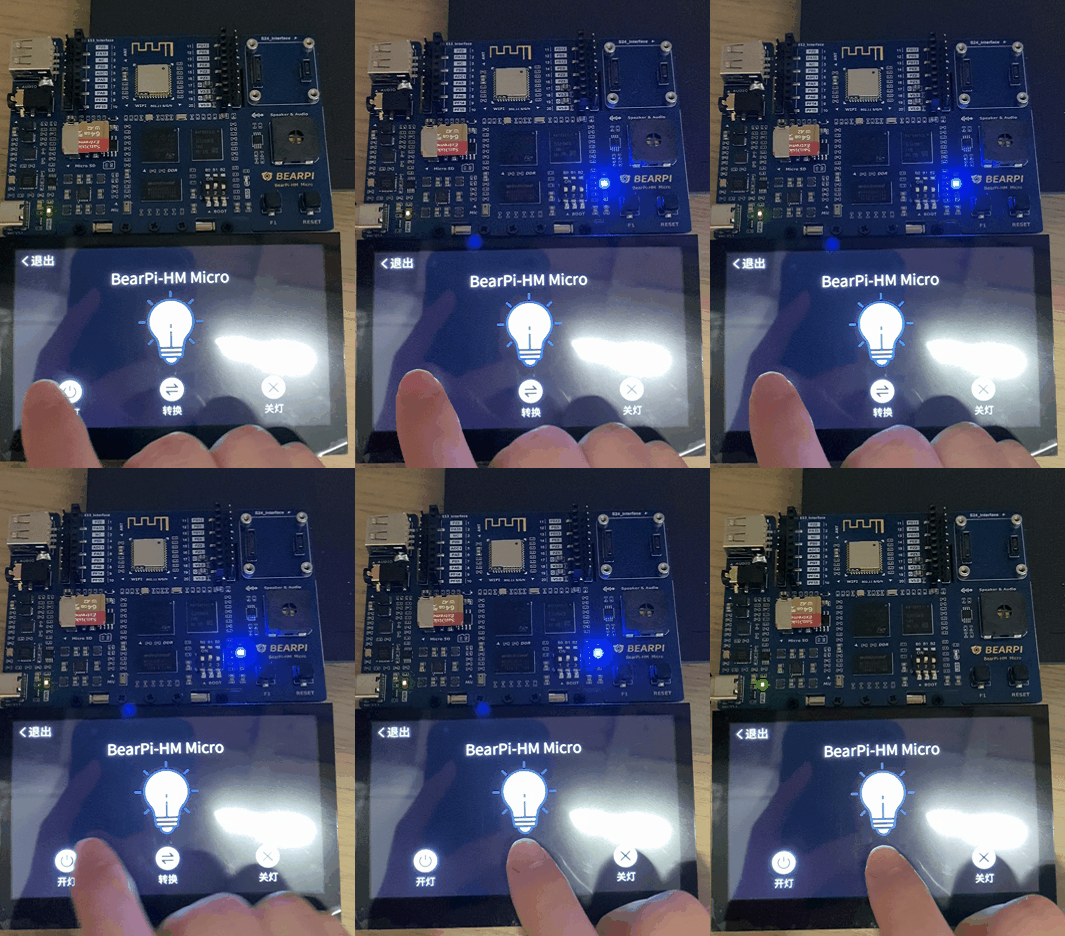
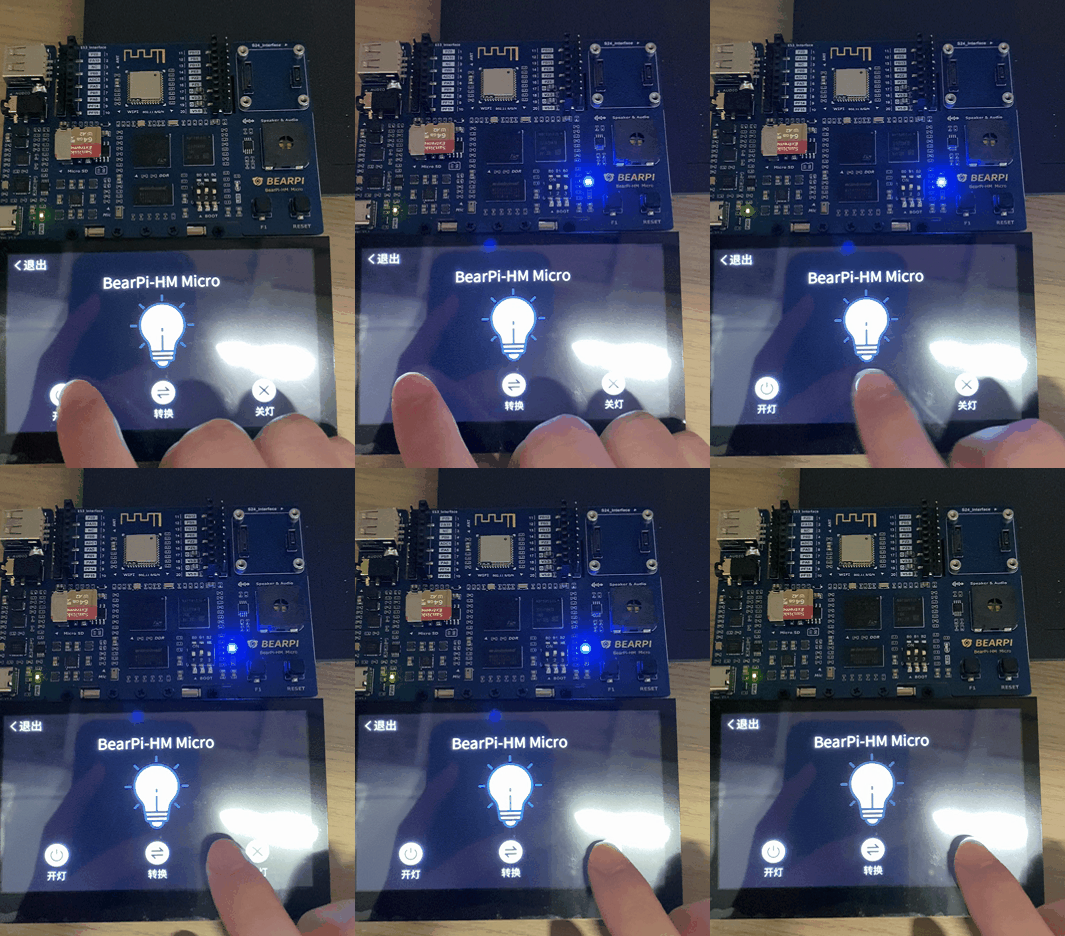
最终成果展示


相关源码(小熊派官方仓库源码):
https://gitee.com/HagonChan/bearpi-hm_micro_app/tree/master/code/Led
https://harmonyos.51cto.com

 蜀ICP备20004578号