
一、介绍
Socket 模块可以用来进行数据传输,支持TCP和UDP两种协议。
本期将为您展示一下:
如何 使用 Socket模块实现 DAYU200开发板 和 Windows PC (SocketTool 工具)的之间的数据传输。
演示环境:
- OpenHarmony SDK API Version 8(3.1.5.5)。
- DevEco Studio 3.0 Beta3。
- Build Version: 3.0.0.900, built on March 30, 2022。
- Runtime version: 11.0.13+7-b1751.21 amd64。
二、开发步骤
1、权限声明
创建项目后,打开项目config.json 配置文件,在module内添加权限声明
  "reqPermissions": [
      {
        "name": "ohos.permission.INTERNET"  //socket权限
      },
      {
        "name": "ohos.permission.GET_WIFI_INFO" //获取wifi地址权限
      }
    ]
2、通过TCP协议方式实现
import需要的socket模块及辅助模块。
Logger是一个自定义的日志模块,方便快速记录和输出统一格式的日志。
import socket from '@ohos.net.socket';
//wifi模块,用于获取当前IP地址
import wifi from '@ohos.wifi';
//日志模块
import logger from '../common/Logger'
创建一个TCPSocket连接,返回一个TCPSocket对象。
//tcp连接对象
let tcp = socket.constructTCPSocketInstance();
//目标地址和端口
let targetAddr = {
  address: '192.168.0.168',
  family: 1,
  port: 0 //7001/8001
}
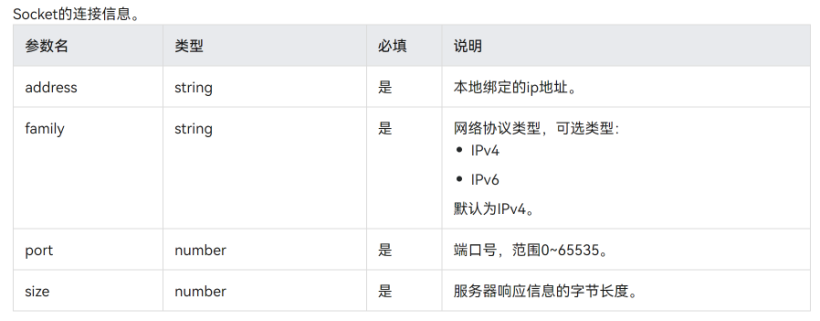
(可选)订阅TCPSocket相关的订阅事件。
订阅了connect 、message、close 事件。message事件的回调中可以获取接收到的数据,但是一个ArrayBuffer,需要通过resolveArrayBuffer函数进行进一步解析。
 aboutToAppear() {
    this.tcpInit()
  }
  tcpInit() {
    tcp.on('connect', () => {
      this.status = '已连接'
      logger.getInstance(this).debug("on tcp connect success");
    });
    tcp.on('message', value => {
      this.message_recv = this.resolveArrayBuffer(value.message)
      logger.getInstance(this)
        .debug(`on tcp message:${this.message_recv},remoteInfo:${JSON.stringify(value.remoteInfo)}`);
    });
    tcp.on('close', () => {
      logger.getInstance(this).debug("on tcp close success");
    });

  }
  //解析ArrayBuffer
  resolveArrayBuffer(message: ArrayBuffer): string {
    if (message instanceof ArrayBuffer) {
      let dataView = new DataView(message)
      logger.getInstance(this).debug(`length ${dataView.byteLength}`)
      let str = ""
      for (let i = 0;i < dataView.byteLength; ++i) {
        let c = String.fromCharCode(dataView.getUint8(i))
        if (c !== "\n") {
          str += c
        }
      }
      logger.getInstance(this).debug(`message aray buffer:${str}`)
      return str;
    }
  }
绑定IP地址和端口,端口可以指定或由系统随机分配。
  //本地地址和端口
    let localAddr = {
        address: this.resolveIP(wifi.getIpInfo().ipAddress),
        port: 0
    }
    //bind本地地址
    tcp.bind({ address: this.localAddr.address, port: 8000, family: 1 })
      .then(() => {
        logger.getInstance(this).debug(`bind tcp success`);
      }).catch(err => {
      logger.getInstance(this).error(`bind tcp failed ${err}`);
      return
    });
}
连接到指定的IP地址和端口。
Button('连接TCP')
  .width('90%')
  .height(80)
  .margin({ top: 20 })
  .type(ButtonType.Capsule)
  .onClick(() => {
    this.tcpConnect()
  })
  //连接TCP
  tcpConnect() {
    tcp.getState()
      .then((data) => {
        logger.getInstance(this).debug(`====${JSON.stringify(data)}`)
        if (data.isClose) {
          this.tcpInit()
        }
        //开始连接
        tcp.connect(
          {
            address: { address: targetAddr.address, port: 8001, family: 1 }, timeout: 6000
          }
        ).then(() => {
          logger.getInstance(this).debug(`connect success`);
        }).catch((error) => {
          logger.getInstance(this).error(`connect failed ${JSON.stringify(error)}`);
        })
      })
  }
发送数据。
Button('发送TCP消息')
    .width('90%')
    .height(80)
    .margin({ top: 20 })
    .type(ButtonType.Capsule)
    .onClick(() => {
        this.tcpSend()
    })
//发送TCP消息
tcpSend() {
    //查看状态
    tcp.getState().then((data) => {
        logger.getInstance(this).debug(`====${JSON.stringify(data)}`)
        //已连接,就发送数据
        if (data.isConnected) {
            //发送消息
            tcp.send(
                { data: this.message_send, }
            ).then(() => {
                logger.getInstance(this).debug(`send success`);
            }).catch((error) => {
                logger.getInstance(this).error(`send failed ${JSON.stringify(error)}`);
            })
        } else {
            logger.getInstance(this).error(`not connect`);
        }
    })
}
Socket连接使用完毕后,主动关闭。
Button('关闭TCP连接')
    .width('90%')
    .height(80)
    .margin({ top: 20 })
    .type(ButtonType.Capsule)
    .onClick(() => {
        this.tcpClose()
    })
//关闭TCP连接
tcpClose() {
    tcp.close().then(() => {
        this.status = '已断开'
        logger.getInstance(this).debug(`tcp.close success`)
    }).catch((err) => {
        logger.getInstance(this).error(`tcp.close error:${JSON.stringify(err)}`)
    })
    tcp.off('close');
    tcp.off('message');
    tcp.off('connect');
}
3、通过UDP协议方式实现
import需要的socket模块及辅助模块。
Logger是一个自定义的日志模块,方便快速记录和输出统一格式的日志。
import socket from '@ohos.net.socket';
//wifi模块,用于获取当前IP地址
import wifi from '@ohos.wifi';
//日志模块
import logger from '../common/Logger'
创建一个UDPSocket连接,返回一个UDPSocket对象。
//udp连接对象
let udp = socket.constructUDPSocketInstance();
//目标地址和端口
let targetAddr = {
  address: '192.168.0.168',
  family: 1,
  port: 0 //7001/8001
}
(可选)订阅UDPSocket相关的订阅事件。
订阅了listening、message、close 事件。message事件的回调中可以获取接收到的数据,但是一个ArrayBuffer,需要通过resolveArrayBuffer函数进行进一步解析。
  aboutToAppear() {
    this.udpInit()
  }
  udpInit() {
    udp.on('listening', () => {
      logger.getInstance(this).debug("on udp listening success");
    });
    udp.on('message', value => {
      this.message_recv = this.resolveArrayBuffer(value.message)
      logger.getInstance(this)
        .debug(`on udp message:${this.message_recv},remoteInfo:${JSON.stringify(value.remoteInfo)}`);
    });
    udp.on('close', () => {
      logger.getInstance(this).debug(`on udp close success`);
    });
  }
  //解析ArrayBuffer
  resolveArrayBuffer(message: ArrayBuffer): string {
    if (message instanceof ArrayBuffer) {
      let dataView = new DataView(message)
      logger.getInstance(this).debug(`length ${dataView.byteLength}`)
      let str = ""
      for (let i = 0;i < dataView.byteLength; ++i) {
        let c = String.fromCharCode(dataView.getUint8(i))
        if (c !== "\n") {
          str += c
        }
      }
      logger.getInstance(this).debug(`message aray buffer:${str}`)
      return str;
    }
  }
绑定IP地址和端口,端口可以指定或由系统随机分配。
 //本地地址和端口
    let localAddr = {
        address: this.resolveIP(wifi.getIpInfo().ipAddress),
        port: 0
    }
    //bind本地地址
    udp.bind({ address: this.localAddr.address, family: 1 })
      .then(() => {
        logger.getInstance(this).debug(`bind upd success`);
      }).catch((err) => {
      logger.getInstance(this).error(`bind upd failed ${JSON.stringify(err)}`);
    })
}
发送数据。
Button('发送UDP消息')
    .width('90%')
    .height(80)
    .margin({ top: 50 })
    .type(ButtonType.Capsule)
    .onClick(() => {
      this.udpSend()
  })
//发送UDP消息
udpSend() {
    //查看状态
    udp.getState().then((data) => {
      logger.getInstance(this).debug(`====${JSON.stringify(data)}`)
      //如果已关闭,就重新初始化
      if (data.isClose) {
        this.udpInit()
      }
      //已绑定,就发送数据
      if (data.isBound) {
        udp.send(
          {
            data: this.message_send,
            address: { address: targetAddr.address, port: 7001, family: 1 }
          }
        )
          .then(() => {
            logger.getInstance(this).debug(`send success`);
          })
          .catch((error) => {
            logger.getInstance(this).error(`send failed ${typeof error.code}`);
          })
      }
    })
  }
Socket连接使用完毕后,主动关闭。
Button('关闭UDP')
    .width('90%')
    .height(80)
    .margin({ top: 20 })
    .type(ButtonType.Capsule)
    .onClick(() => {
        this.udpClose()
    })
udpClose() {
    udp.close().then(() => {
        logger.getInstance(this).debug("udp.close success");
    }).catch((err) => {
        logger.getInstance(this).error(`udp.close error:${JSON.stringify(err)}`)
    })
    udp.off('message');
    udp.off('listening');
    udp.off('close');
}
三、效果展示
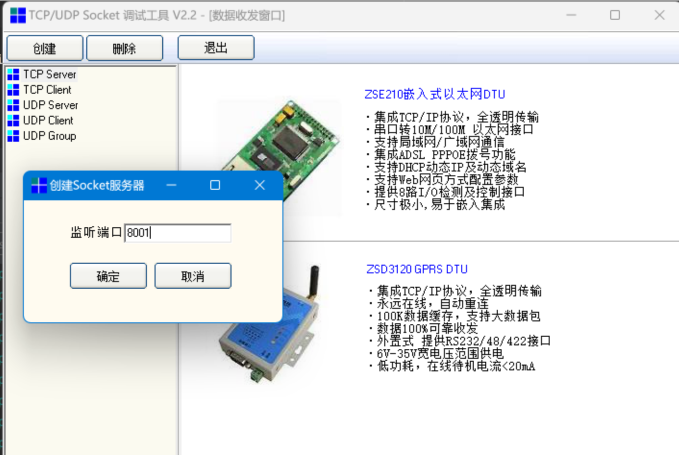
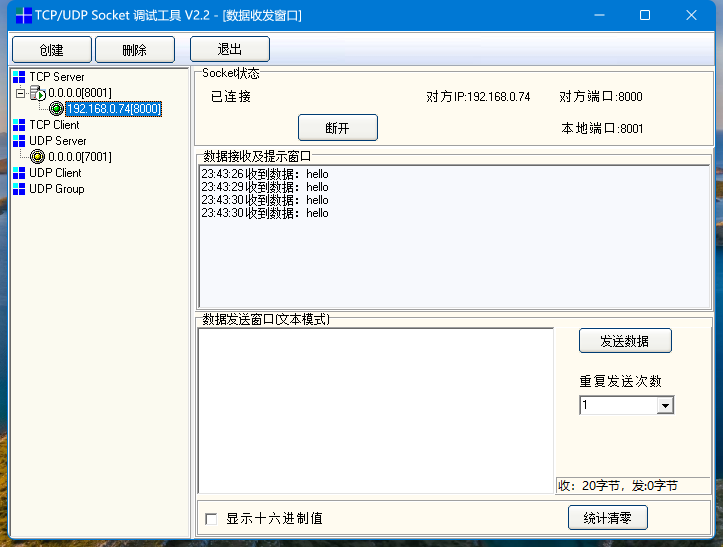
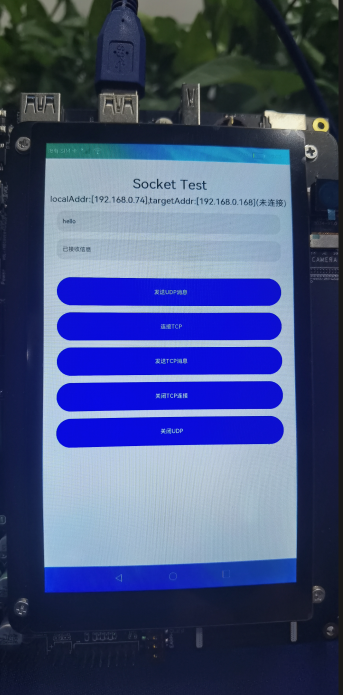
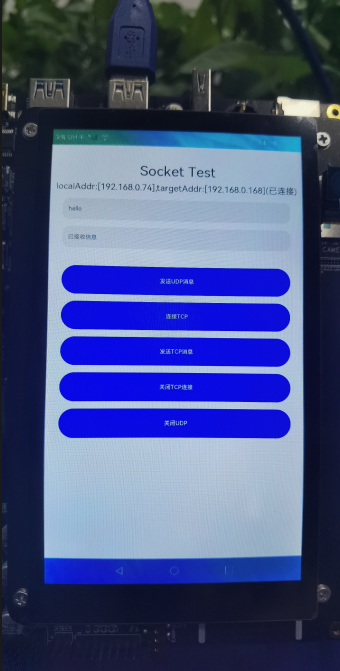
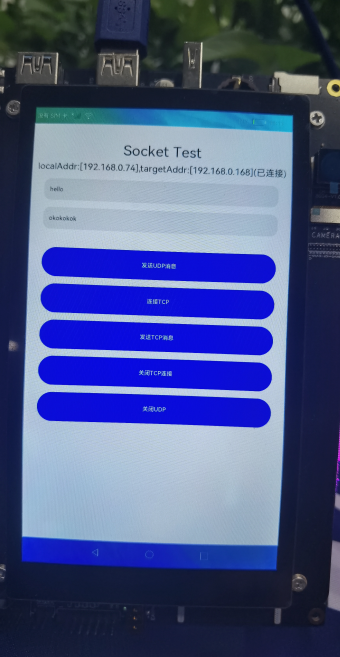
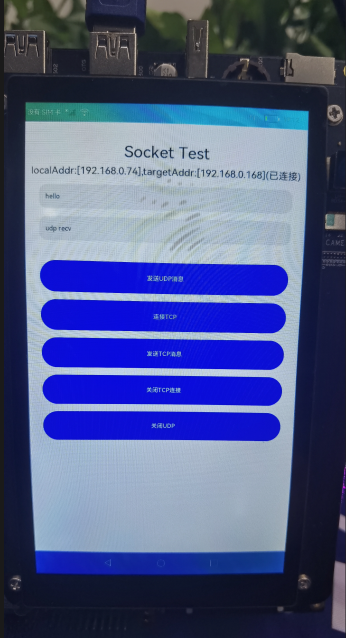
windows系统上打开SocketTool 工具,分别创建TCP Server、UDP Server,监听端口分别为8001、7001。
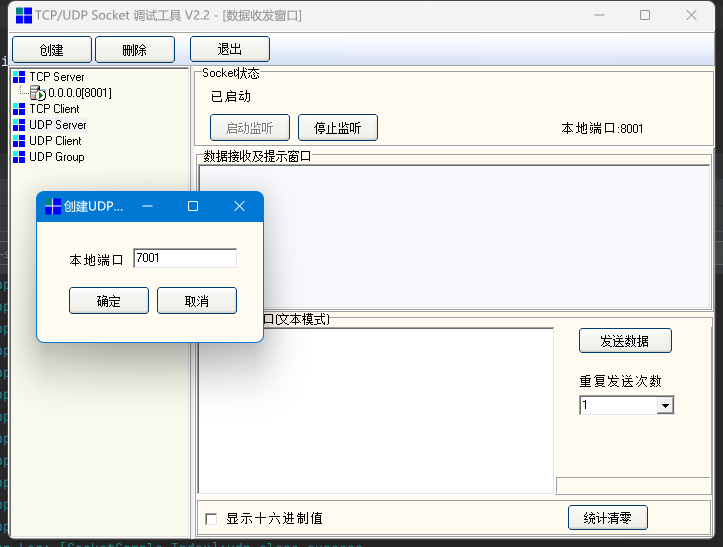
点击,DAYU200开发板应用上 “连接” 按钮,Socket工具显示已连接。
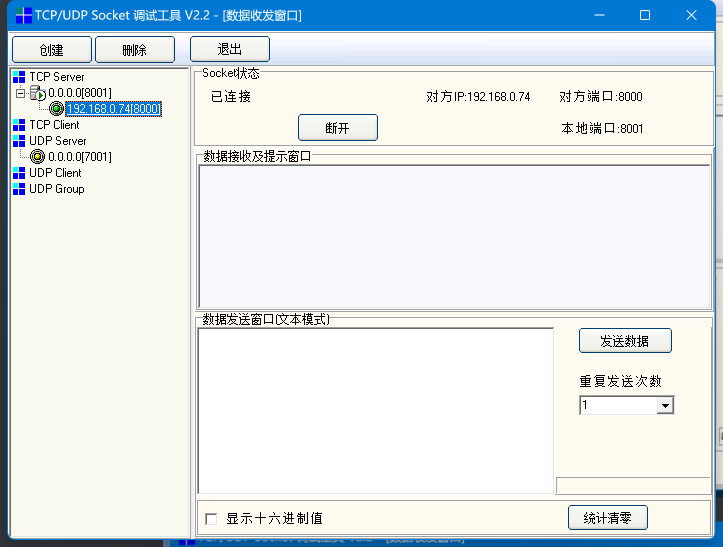
点击 DAYU200开发板应用上 “发送TCP消息” 按钮,Socket工具显示接收到的消息。
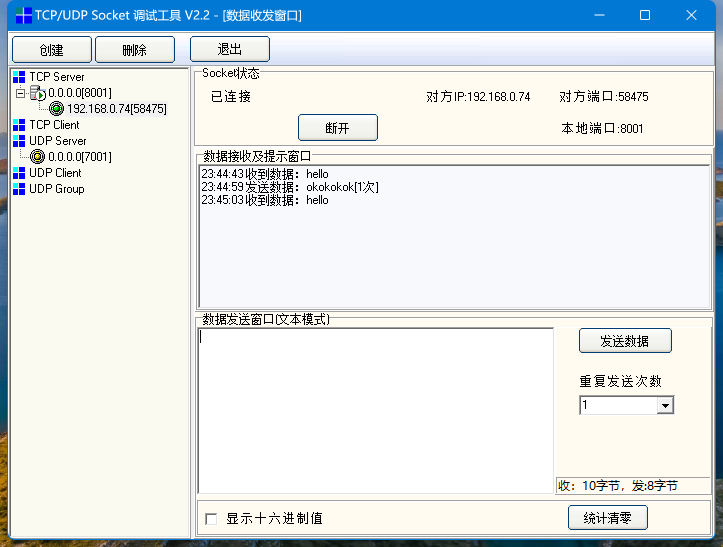
Socket工具上输入要回复的消息,点击 “发送数据” 按钮。
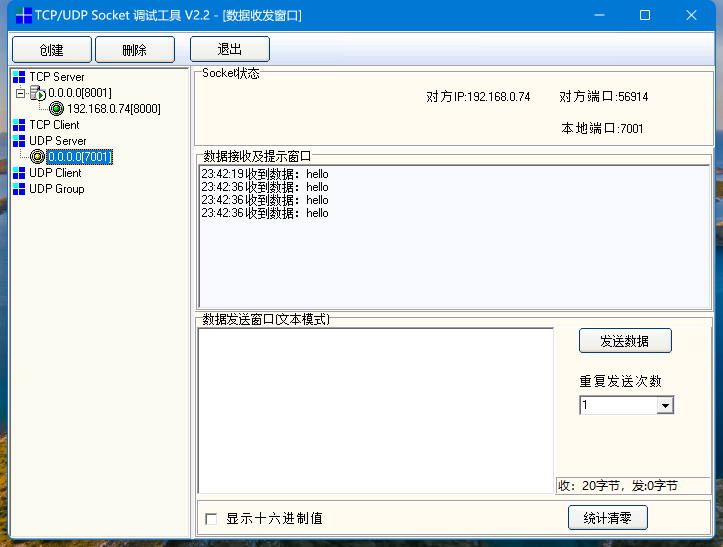
点击 DAYU200开发板应用上 “发送UDP消息” 按钮,Socket工具UDP Server 栏 显示接收到的消息。
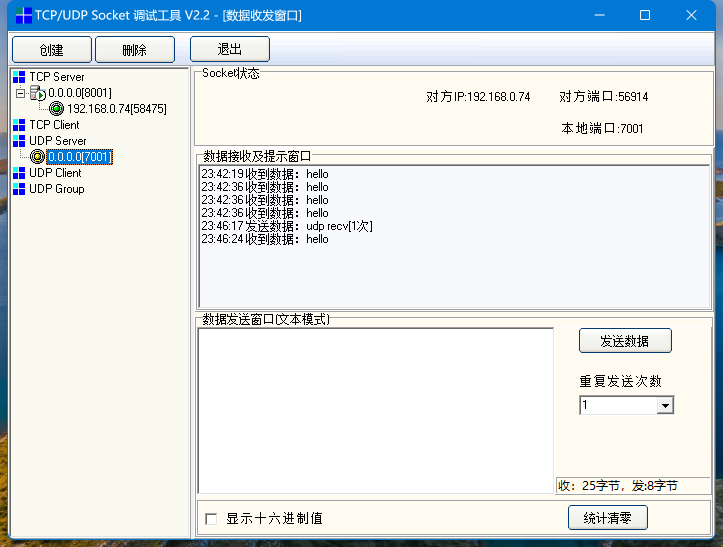
Socket工具上输入要回复的消息 ,点击 “发送数据” 按钮。
四、思考总结
TCP是面向连接的协议,在收发数据前必须和对方建立可靠的连接,UDP是一个面向无连接的协议,数据传输前,源端和终端不建立连接,所以TCP的方式比UDP多一个connect的过程。
getState接口的状态值有3个,isBound、isClose 是udp/tcp 都会用,isConnected是给tcp用的 。{“isBound”:true,“isClose”:false,“isConnected”:true}
用Socket 工具回复消息后,DAYU200侧如果要显示接收到的消息,需要再发送一次消息。
五、参考资料
1、HarmonyOS API参考。
https://developer.harmonyos.com/cn/docs/documentation/doc-references/js-apis-net-socket-0000001144636978。
2、OpenHarmony Gitee 样例指导。
https://gitee.com/openharmony/docs/blob/master/zh-cn/application-dev/connectivity/socket-connection.md。
 蜀ICP备20004578号