OpenHarmony3.1支持很多组件,这篇文章演示一下如何使用滑杆组件(Slider)控制另一个组件。这个案例通过两个Slider组件分别控制屏幕上方风车的旋转速度和大小。读者可以从中学到Slider组件的基本用法,以及在OpenHarmony中如何控制组件。
OpenHarmony3.1目前支持ETS和JS。本文选用了ETS作为开发语言。要想测试本文的代码,有如下两种方式:
1. 使用HarmonyOS SDK7在远程模拟器中测试。
2. 使用大禹200开发板(或其他支持OpenHarmony3.1的开发板)测试。
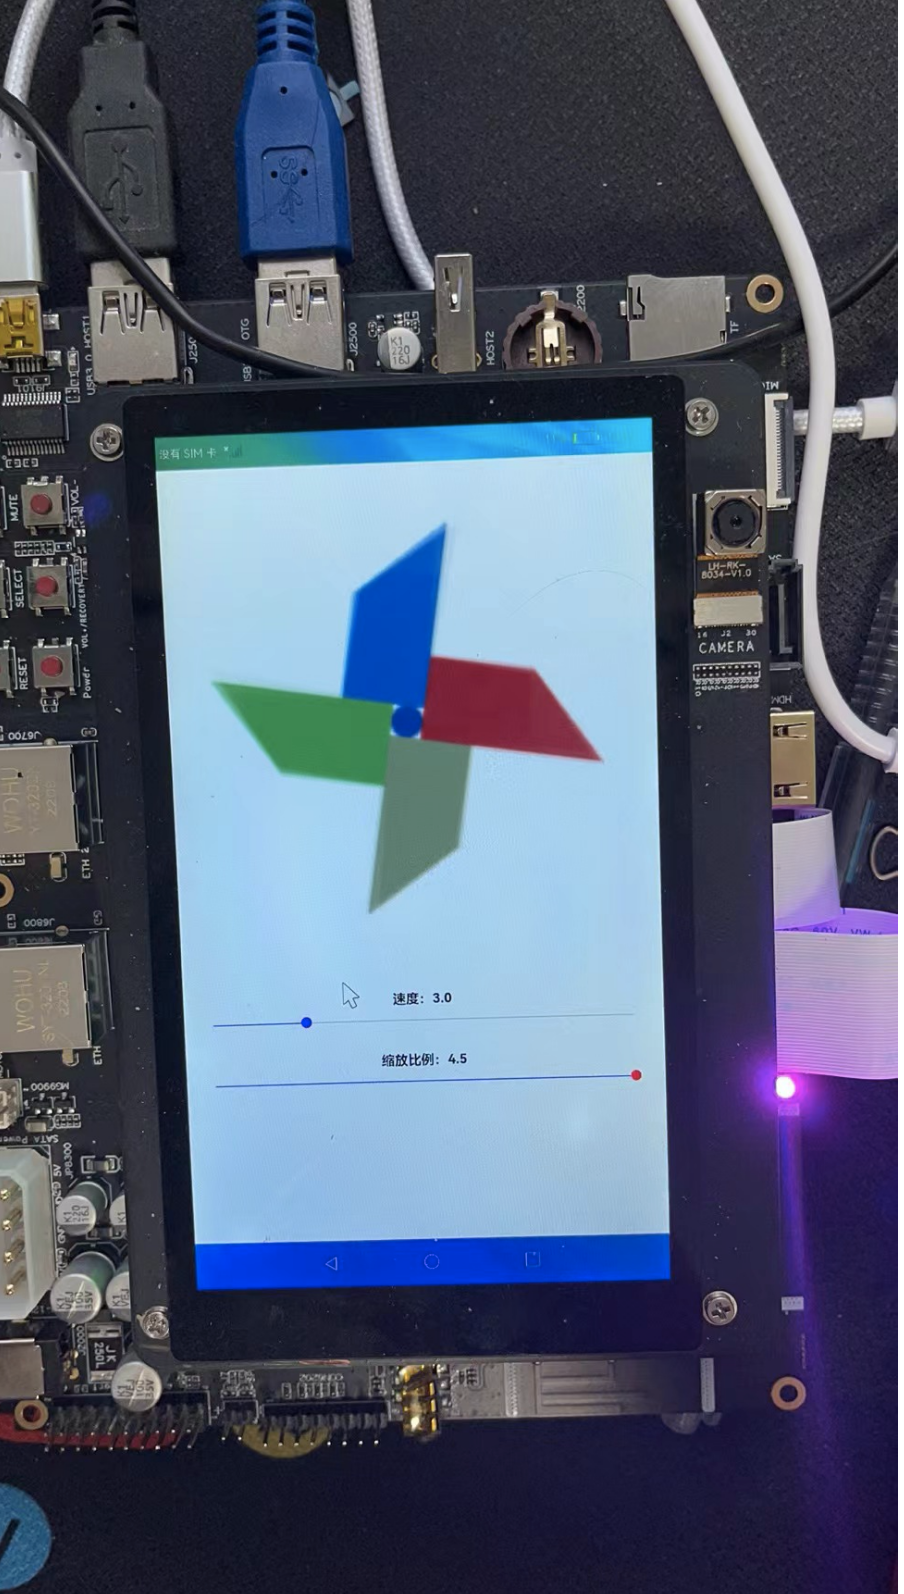
第一种方式只能使用SDK7或以上版本才支持ETS,本章会采用第二种方式,在大禹200开发板中测试这个程序,运行的效果如下图所示。

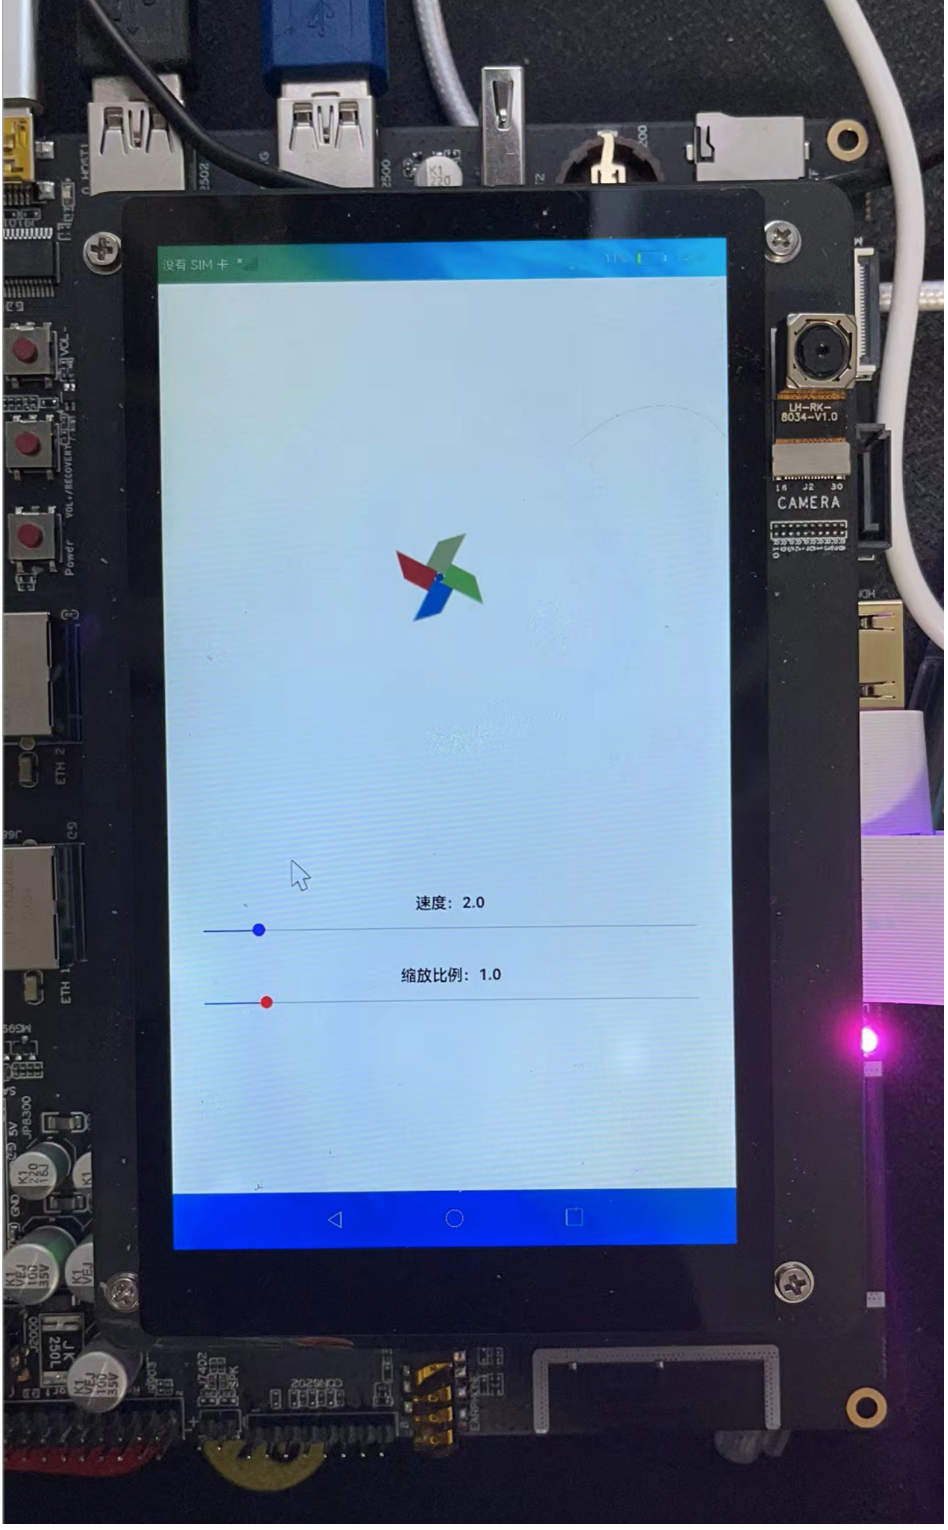
通过第1个Slider组件可以控制风车旋转的速度,通过第2个Slider组件可以控制风车的大小,下图是风车缩小的效果。

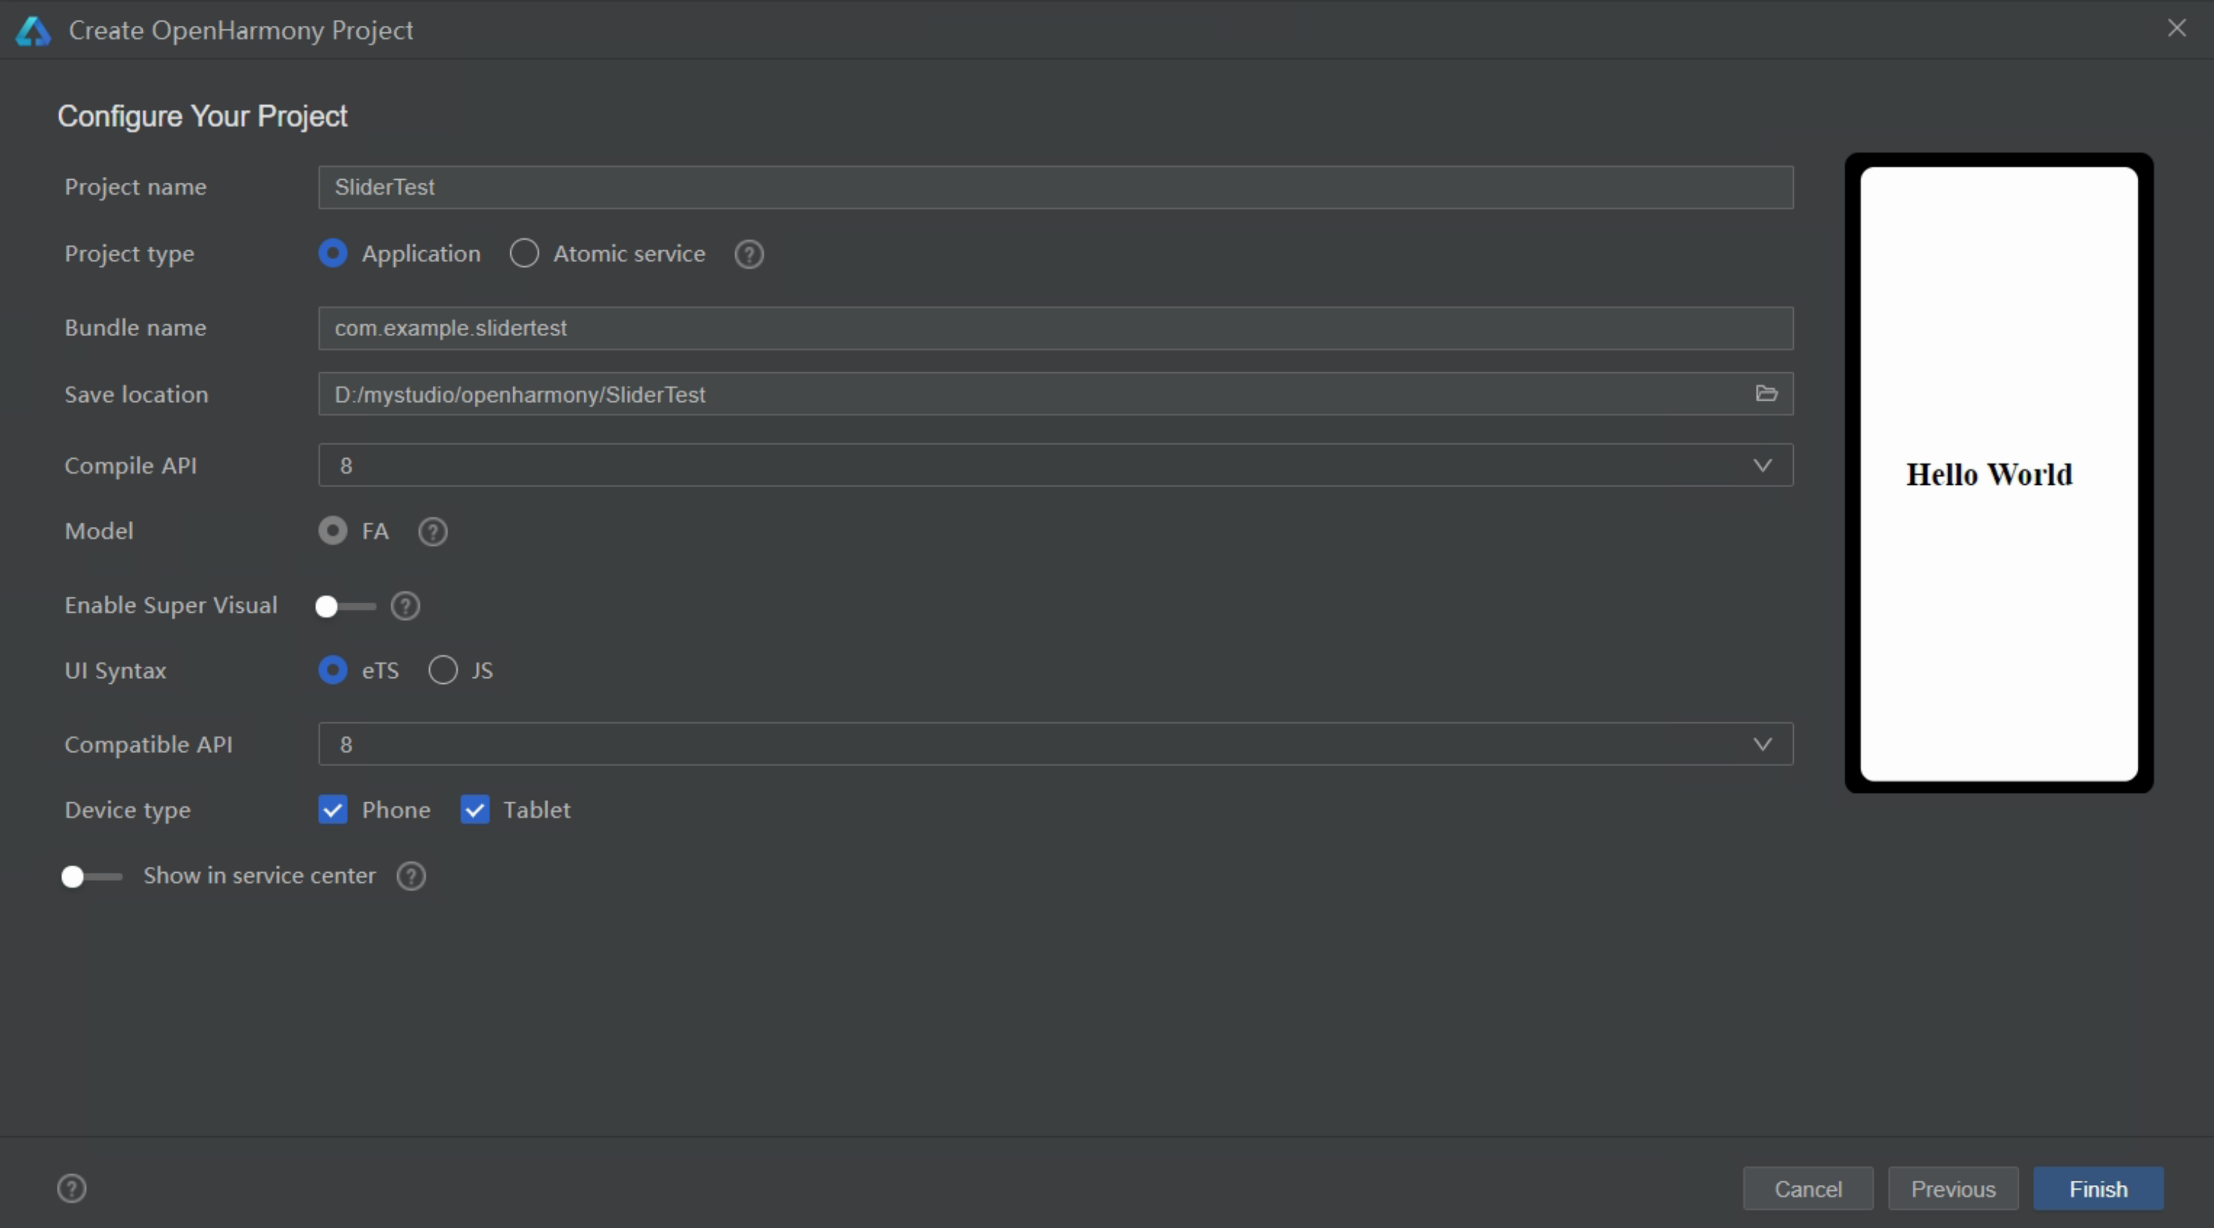
本文会使用ETS编写代码,所以创建工程时保持默认值即可,如下图所示。

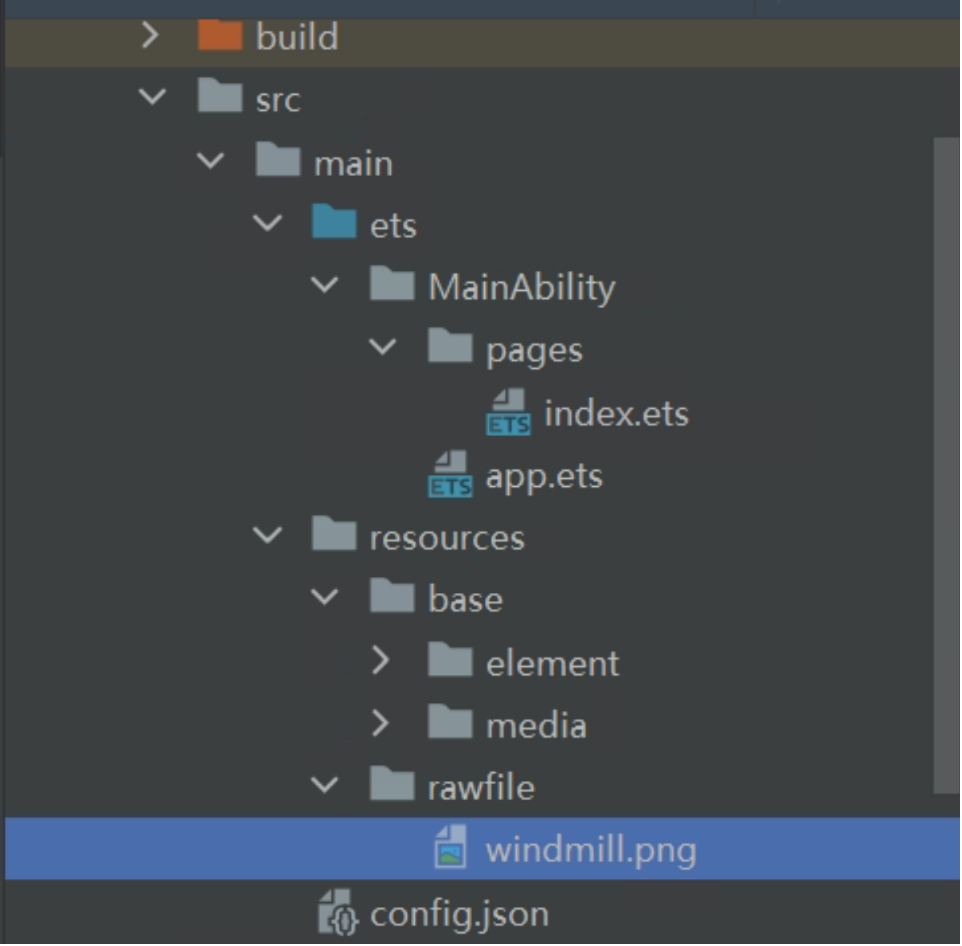
创建完工程,需要找一个风车图像,然后将该图像放到如下图所示的目录中。

本案例中的所有逻辑代码都在index.ets中编写。由于图像放到了rawfile目录中,所以需要用Image组件显示rawfile中的图像,代码如下:
Image($rawfile('windmill.png'))
        .objectFit(ImageFit.Contain)
        .height(150)
        .width(150)
        .margin({ top: 300, bottom: 300, right: 16 })
        .rotate({ x: 0, y: 0, z: 1, angle: this.angle })
        .scale({ x: this.imageSize, y: this.imageSize })
在Image组件中设置了很多属性,如height、width等,这些都是使用静态值设置的,而旋转角度(this.angle)和图像缩放比例(this.imageSize)都使用了变量进行设置,这也是OpenHarmony控制组件的方式。OpenHarmony采用了将变量值与属性的某个属性绑定的方式控制设置或获取组件的属性值,所以要想修改组件的某个属性值,并需要获取组件对象本身,而是直接修改与该属性绑定的变量。
用于控制风车图像缩放比例的Slider组件的代码如下:
Slider({
        value: this.speed,
        min: 1,
        max: 10,
        step: 1,
        style: SliderStyle.OutSet
      })
        .showTips(true)
        .blockColor(Color.Blue)
        .onChange((value: number, mode: SliderChangeMode) => {
            this.speed = value
            clearInterval(this.interval)
            this.speedChange()
      })
在这段代码中有一个关键,就是onChange方法中的this.speed = value。当Slider组件的滑杆滑动时,会触发onChange方法,value参数值就是滑杆的当前值。而this.speed是全局变量,表示风车每次转动变化的角度,也就是Image组件中rotate方法设置的this.angle的增速。
为了让风车转动,使用了定时器每隔一定时间改变Image组件的旋转角度,代码如下:
speedChange() {
    var that = this;
    that.angle = 0;
    // 创建定时器,每隔15毫秒更新一次Image组件的角度
    this.interval = setInterval(function () {
      that.angle += that.speed
    }, 15)
  }
  // 页面启动调用该函数
  onPageShow() {
    // 先清除定时器
    clearInterval(this.interval)
    // 启动定时器
    this.speedChange()
  }
本案例完整的代码如下:
@Entry
@Component
struct Index {
  @State private speed: number = 5
  @State private imageSize: number = 1
  @State private angle: number = 0
  @State private interval: number = 0

  @Builder DescribeText(text:string, speed: number) {
    Stack() {
      Text(text + speed.toFixed(1))
        .margin({ top: 30 })
        .fontSize(20)
        .fontWeight(FontWeight.Bold)
    }
  }

  build() {
    Column() {
      Image($rawfile('windmill.png'))
        .objectFit(ImageFit.Contain)
        .height(150)
        .width(150)
        .margin({ top: 300, bottom: 300, right: 16 })
        .rotate({ x: 0, y: 0, z: 1, angle: this.angle })
        .scale({ x: this.imageSize, y: this.imageSize })
      // 创建Text组件(用于描述Slider组件)
      this.DescribeText('速度:', this.speed)

      Slider({
        value: this.speed,
        min: 1,
        max: 10,
        step: 1,
        style: SliderStyle.OutSet
      })
        .showTips(true)
        .blockColor(Color.Blue)
        .onChange((value: number, mode: SliderChangeMode) => {
        this.speed = value
        console.log("value:" + value);
        clearInterval(this.interval)
        this.speedChange()
      })
      // 创建Text组件(用于描述Slider组件)
      this.DescribeText('缩放比例:', this.imageSize)
      // 用于控制缩放比例
      Slider({
        value: this.imageSize,
        min: 0.5,
        max: 4.5,
        step: 0.1,
        style: SliderStyle.OutSet
      })
        .showTips(true)
        .blockColor(Color.Red)
        .onChange((value: number, mode: SliderChangeMode) => {
        this.imageSize = value
      })
    }
    .margin({ left: 30, right: 30 })
  }

  speedChange() {
    var that = this;
    that.angle = 0;
    this.interval = setInterval(function () {
      that.angle += that.speed
    }, 15)
  }

  onPageShow() {
    clearInterval(this.interval)
    this.speedChange()
  }
}
在这段代码中使用了DescribeText方法创建Text组件,这是由于Text组件会被使用多次,所以做了一个方法统一创建Text组件,会减少代码的冗余。
 蜀ICP备20004578号